Origami Beginner’s Guide
Origami is actually a very easy hobby to pick up, and it’s a lot of fun. All you need is paper, and you can use pretty much any paper you can find. This guide will show you the main folds, the basic bases that are used as the foundation for a huge number of different models, and then you’ll learn how to fold your first model, the traditional paper crane.
Start With the Basics: The Mountain and Valley Folds
These are the two basic folds in origami for beginners. Pretty much every fold is either a mountain fold, a valley fold, or a combination of the two.
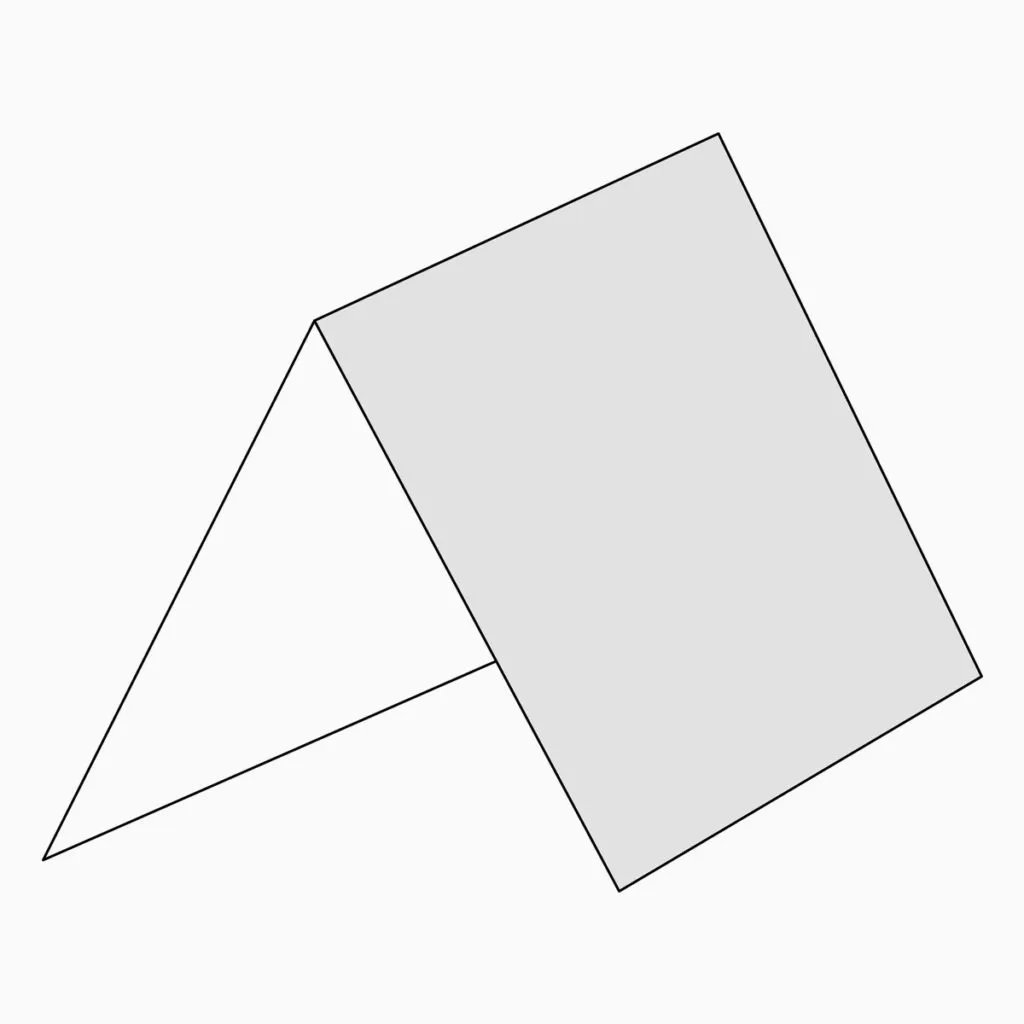
With a Mountain Fold, the crease bends the paper down, and the crease resembles a mountain.
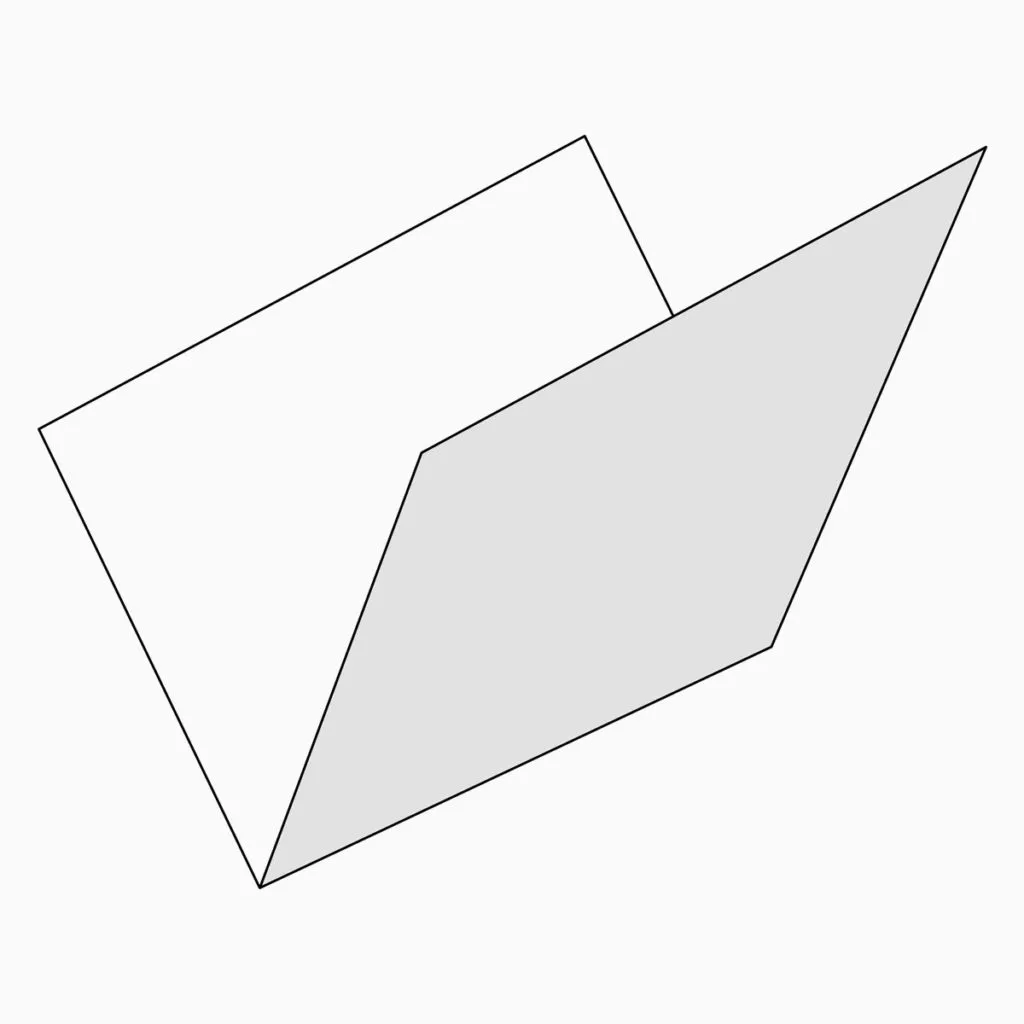
With a Valley Fold, the crease bends the paper up, and the crease resembles a valley.
Common Origami Folds
Here are the most common folds with step-by-step instructions on how to make them. These folds might not look exactly the same as they do in these examples all the time when you’re folding other models. However, these examples should show you how they work so you can figure out what you’re supposed to do when you’re following diagrams.
📜 Note: These diagrams are intentionally exaggerated and distorted to show as many flaps of paper as possible and make them easier to follow. When you fold origami models on your own almost all the time, you’ll need to crease each fold very well and press everything completely flat.
Inside Reverse Fold
This is a very common fold in origami where the paper is folded inside of the model.
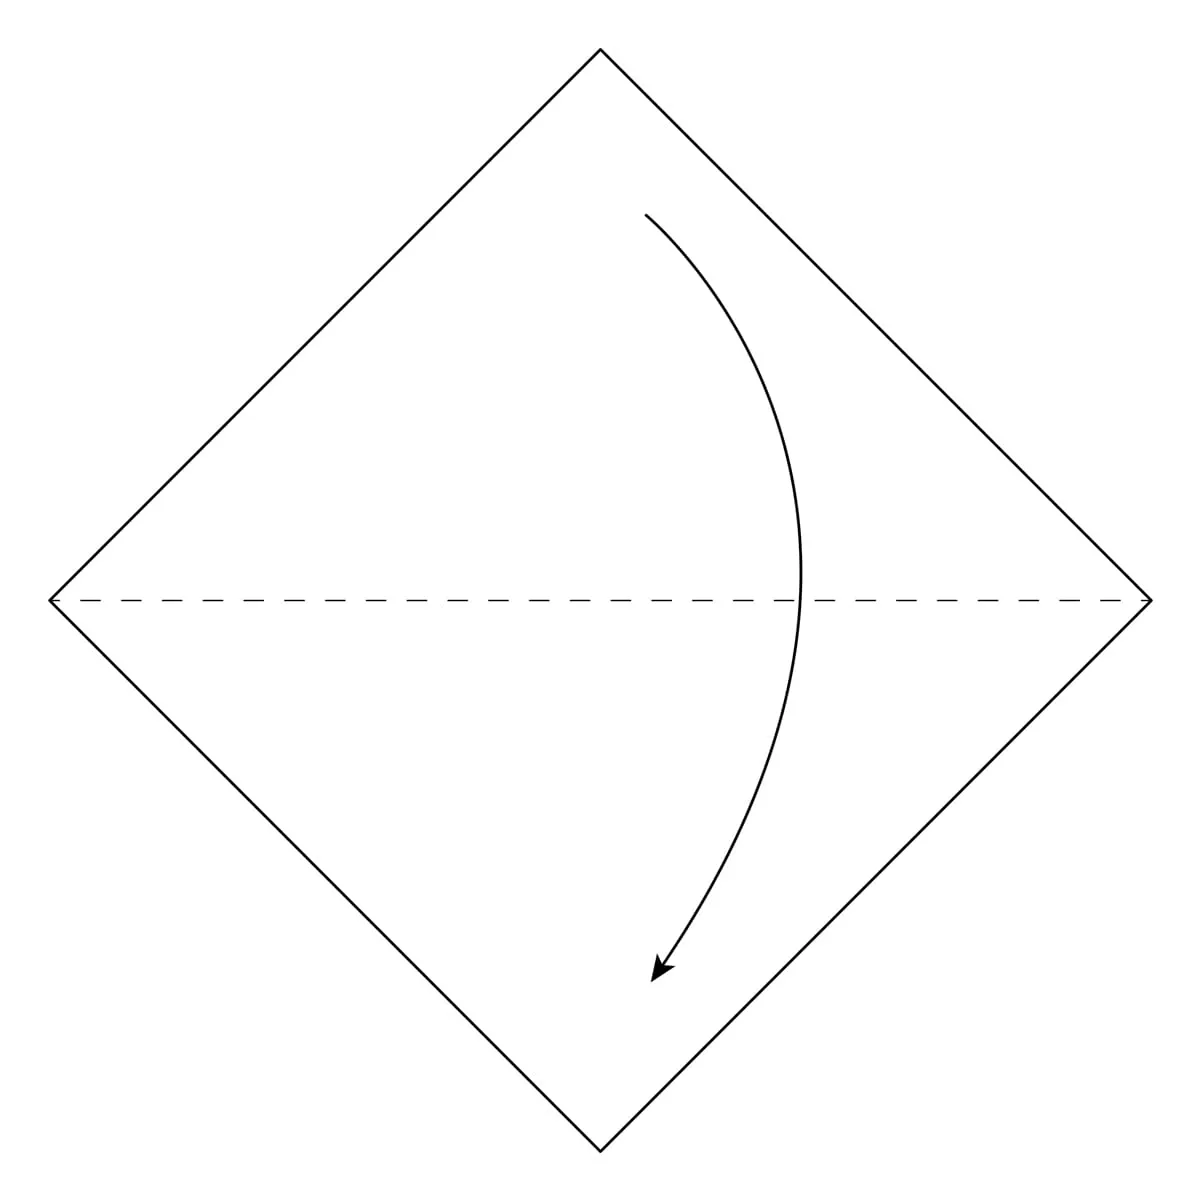
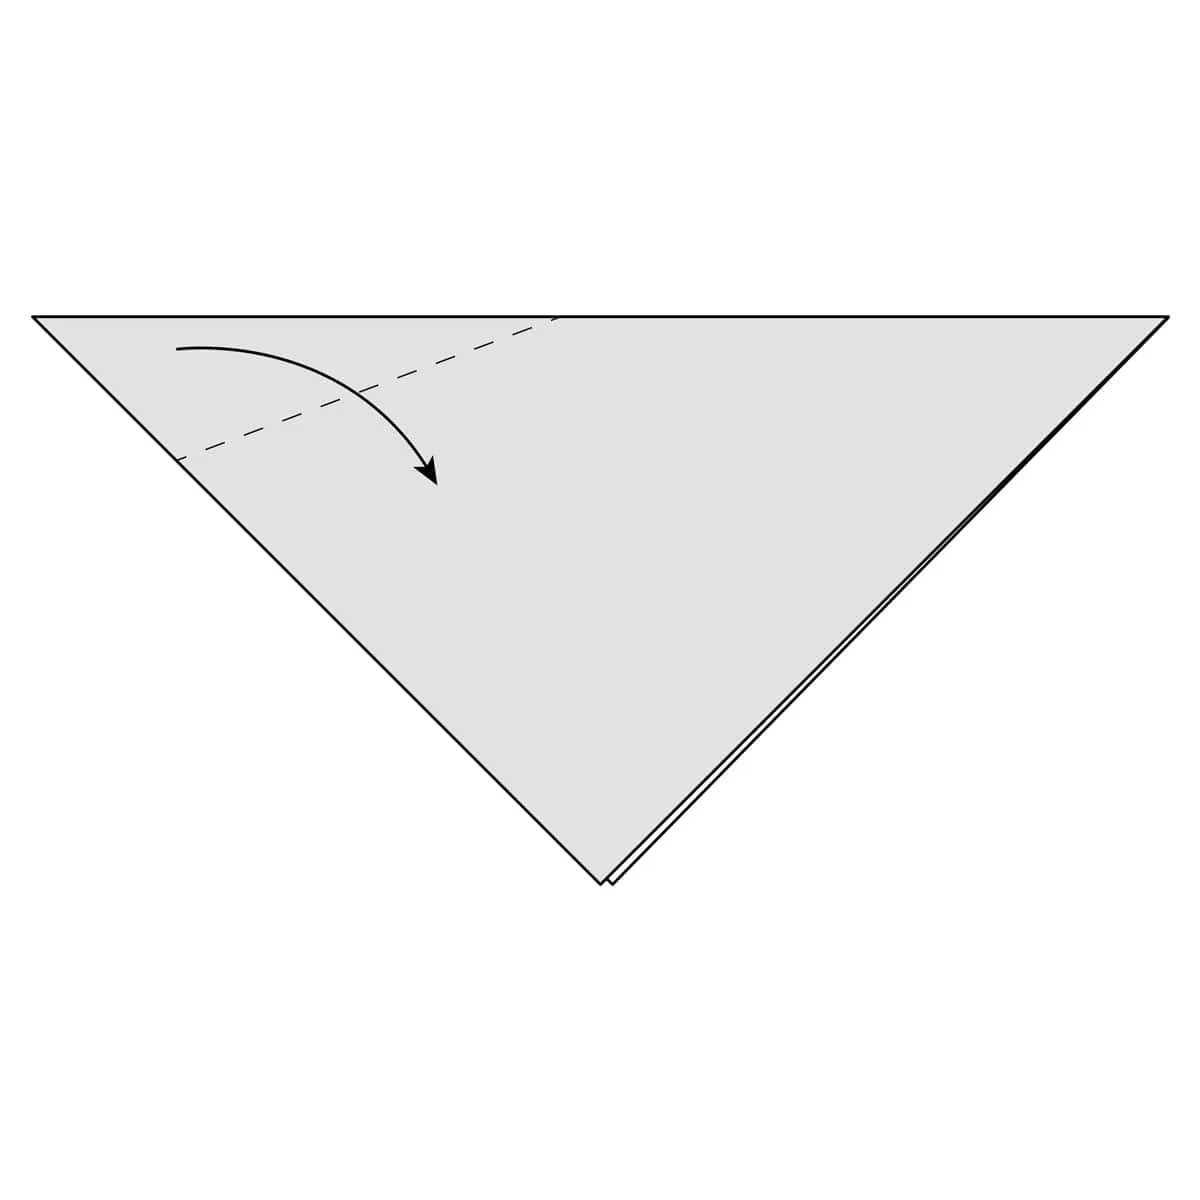
Step 01: Start with a square of paper, white side up, and fold it in half diagonally. This isn’t actually part of the Inside Reverse Fold, but it’ll give you a shape that you can use to make the Inside Reverse Fold on.
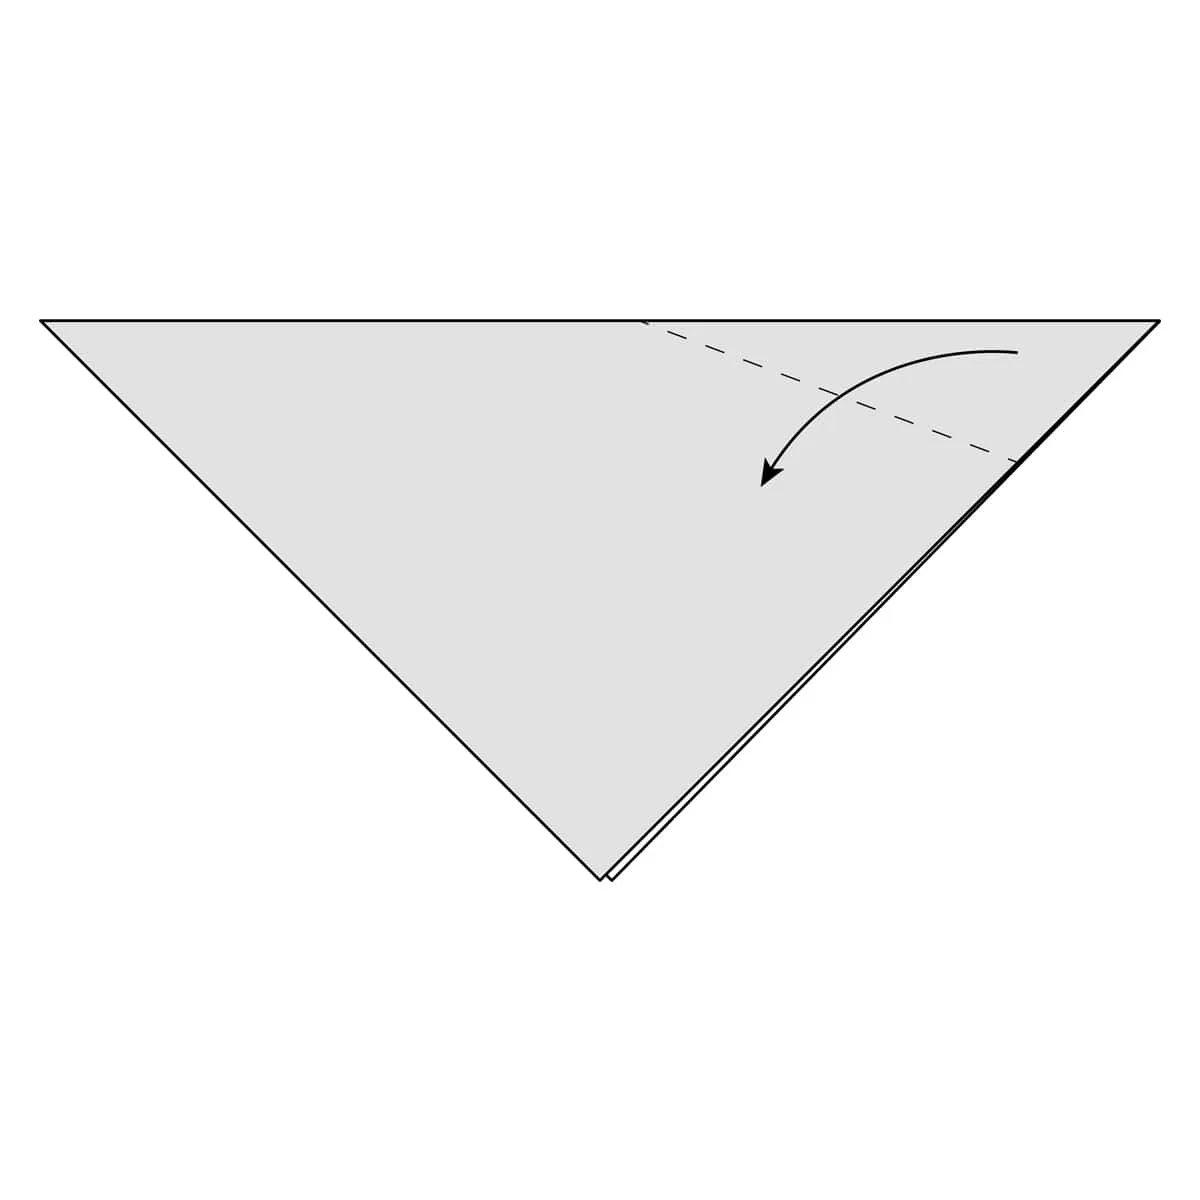
Step 02: Fold along the dotted line. This is where you’re going to make the inside reverse fold. Your fold doesn’t have to match the exact position of the line, so don’t worry if it doesn’t measure up exactly.
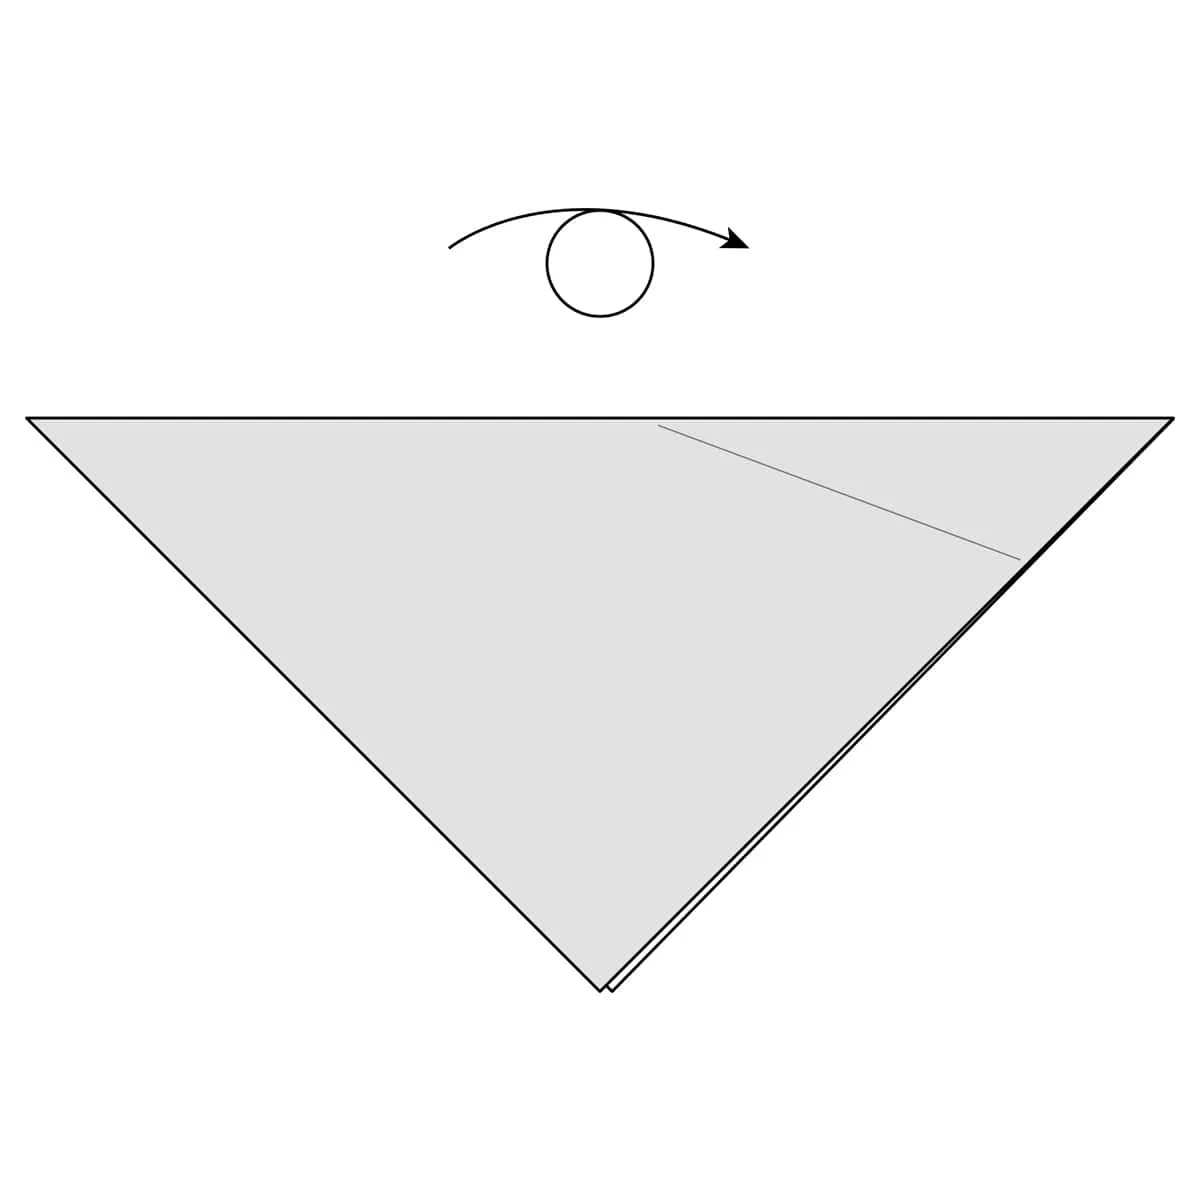
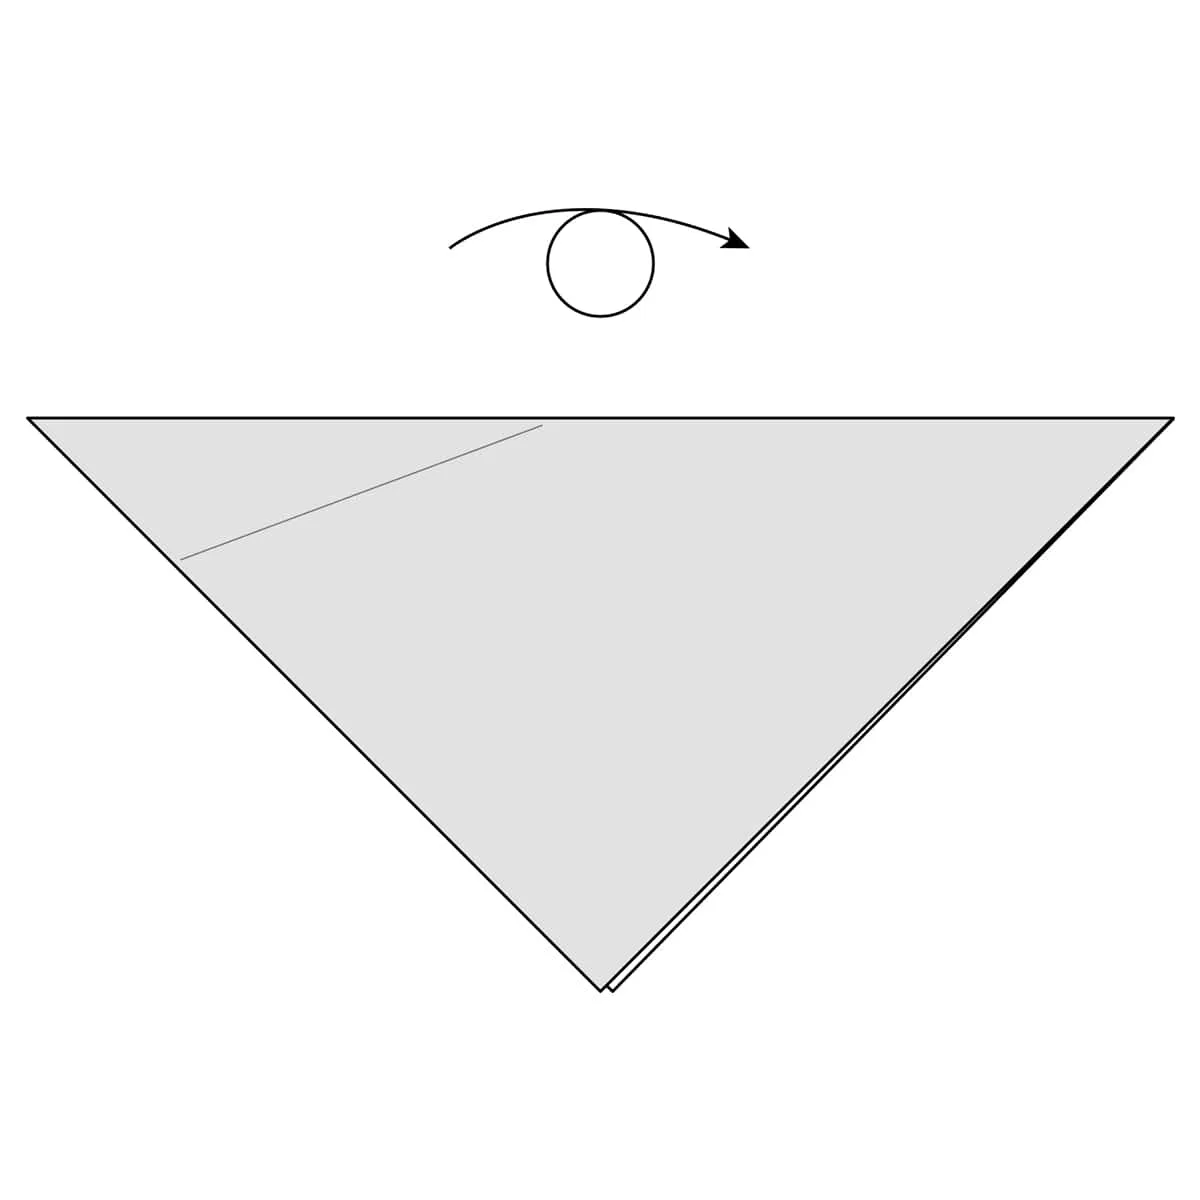
Step 03: Crease this fold well and then unfold it.
Step 04: Turn the paper over.
Step 05: Make a fold along the dotted line. This will be the opposite side of the fold you made earlier. Now you’re folding this the other way.
Step 06: Crease this fold well and then unfold it.
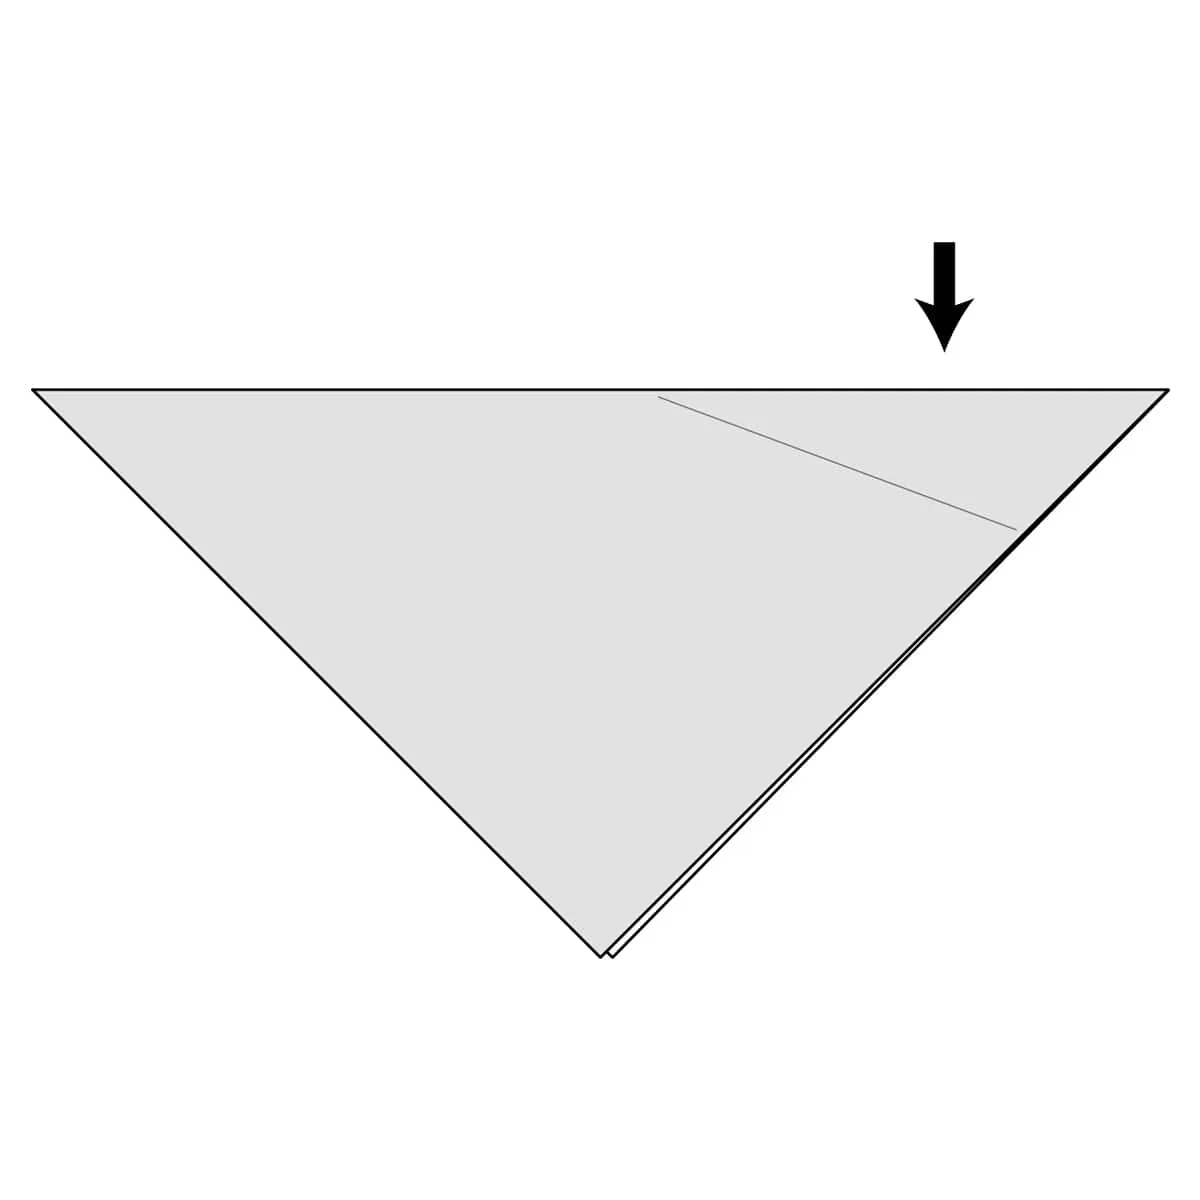
Step 07: Turn the paper over again so it’s back the way it was before.
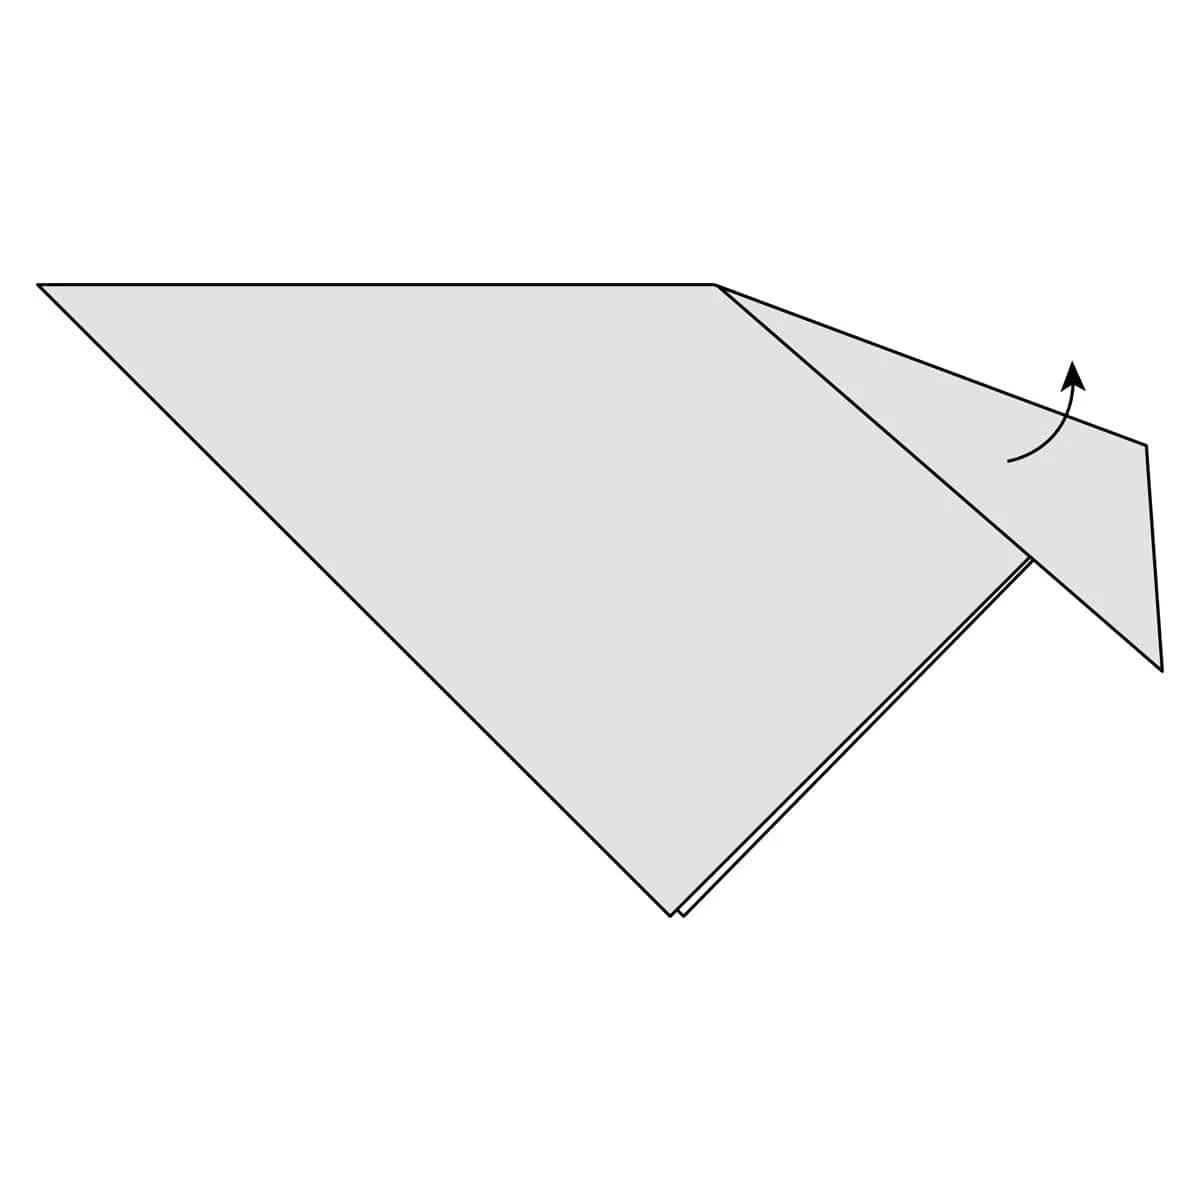
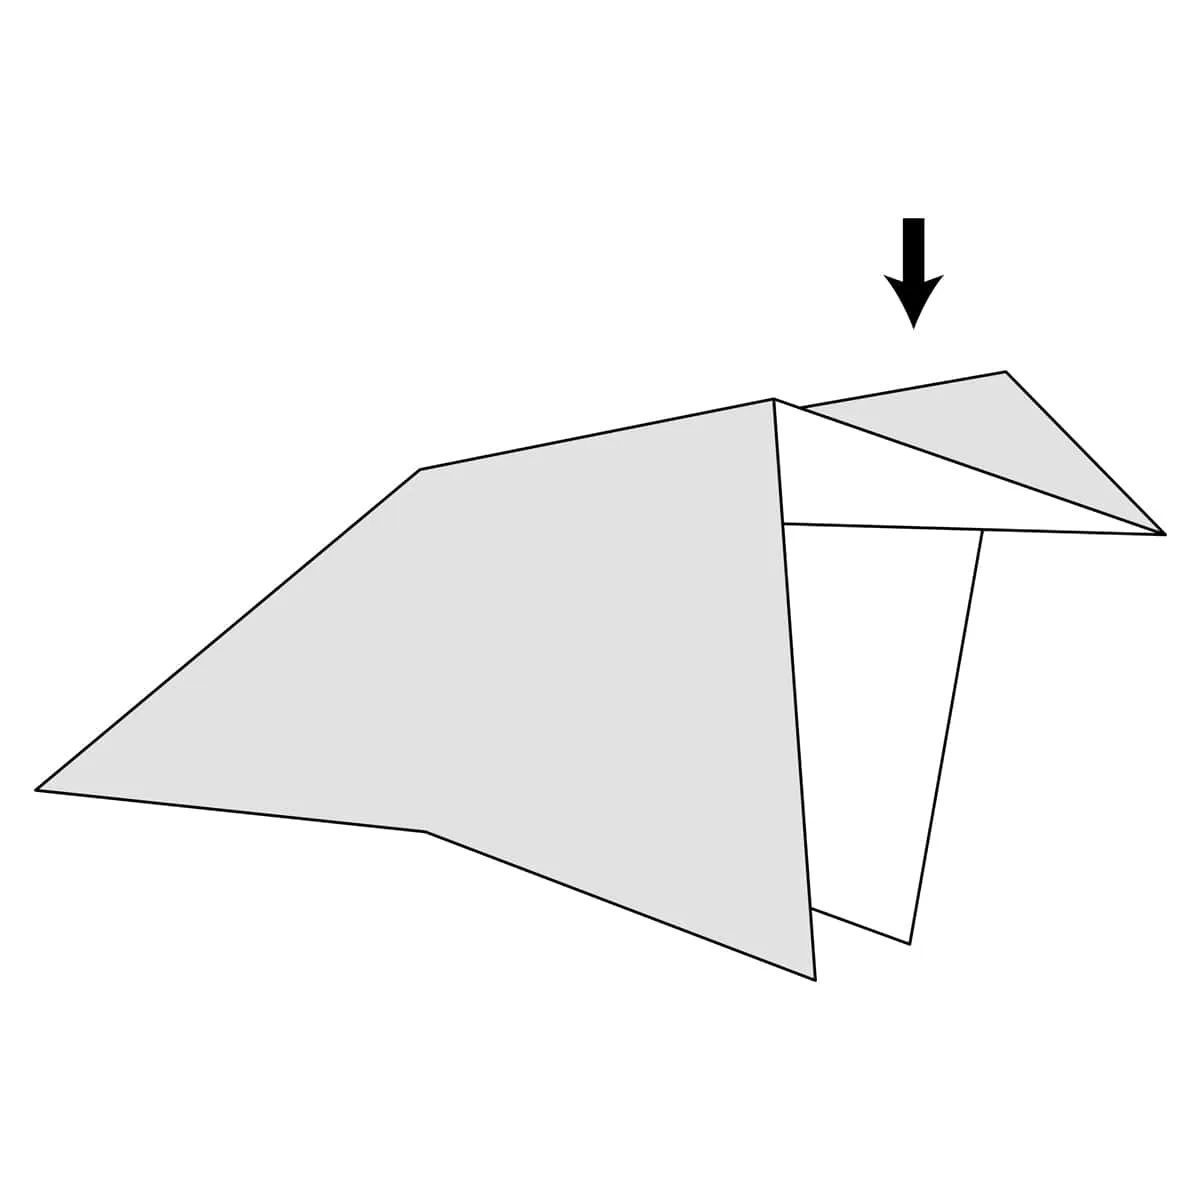
Step 08: Push the paper inside the model following the two folds you made before.
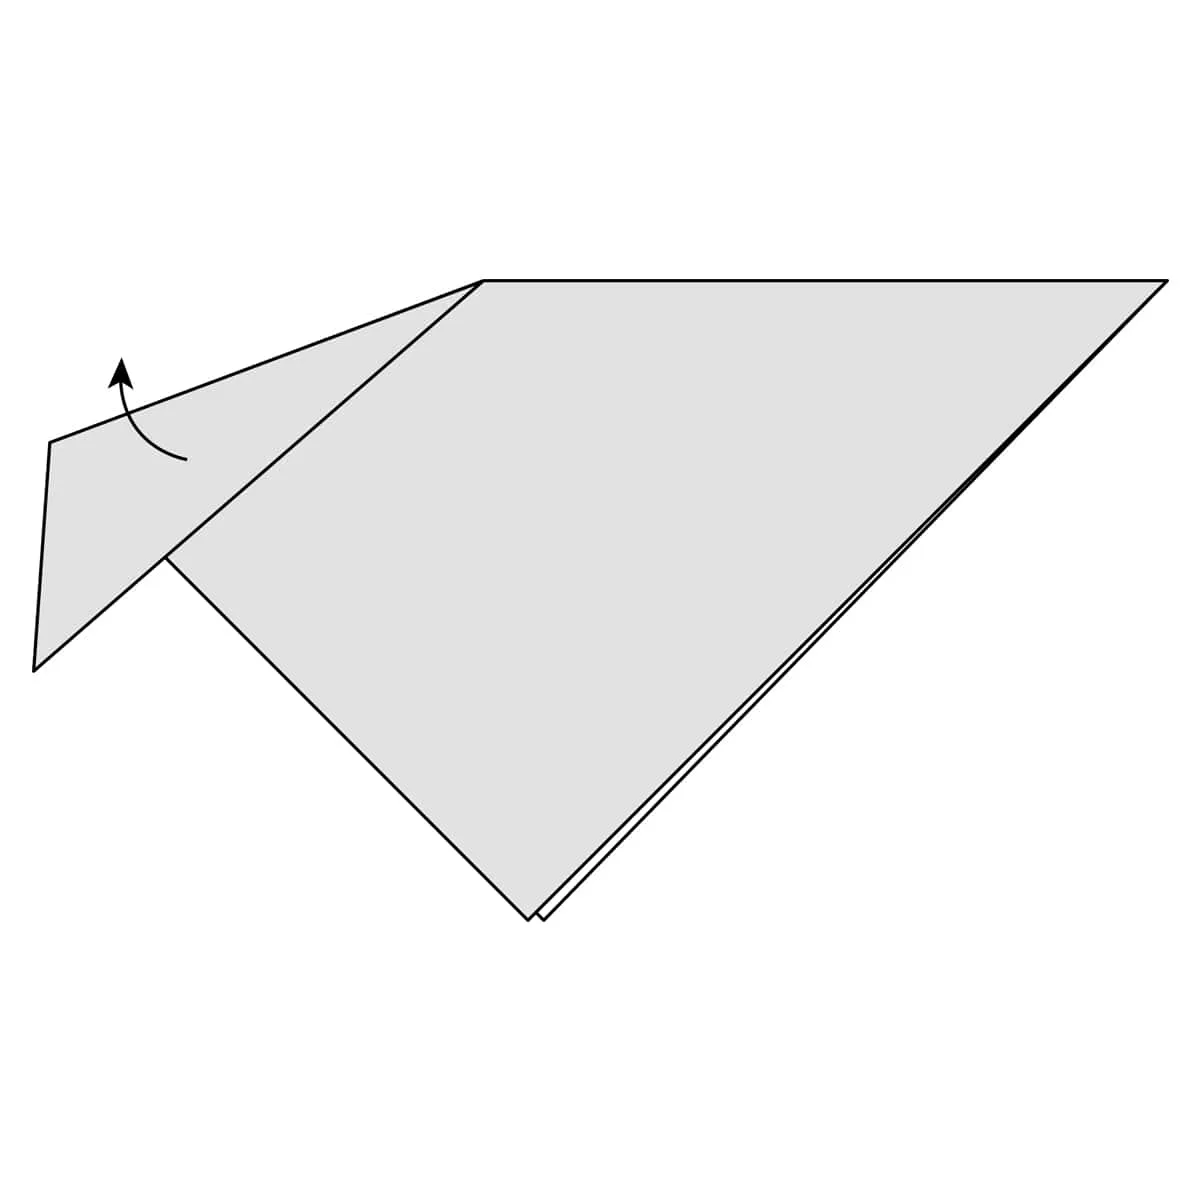
Step 09: Turn the paper over again so it’s back the way it was before.
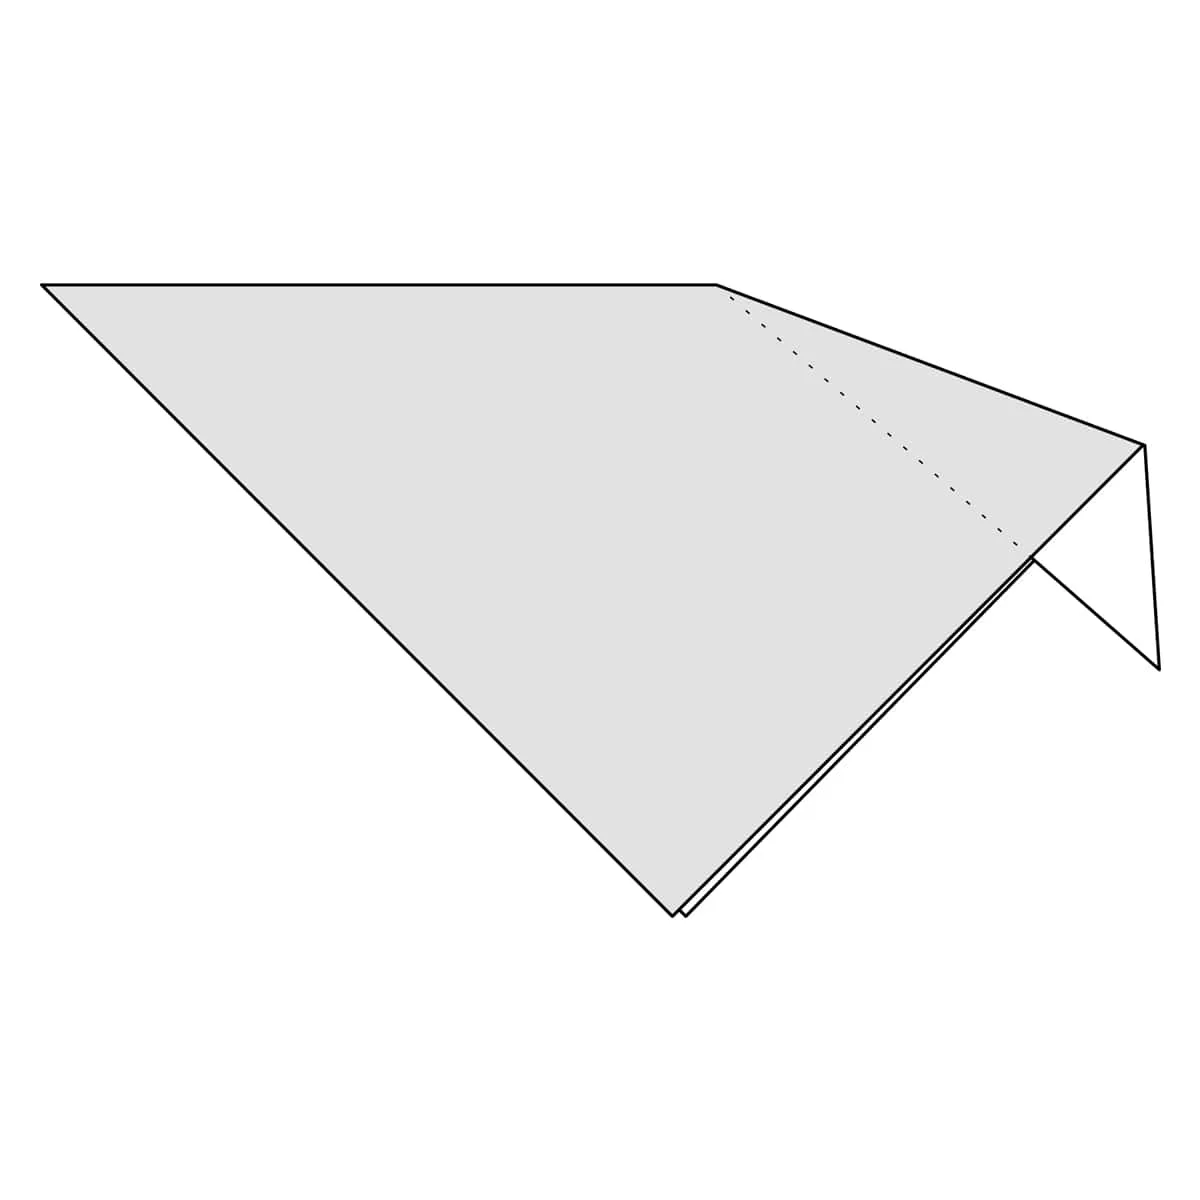
The complete Inside Reverse Fold. The dotted line shows the path of the paper inside the model.
Looking for Even More Origami Instructions?
We have an absolutely massive database of easy origami diagrams. If you’ve successfully understood all the techniques on this page, you should have no trouble folding anything that’s either Beginner or Easy level difficulty.
If you prefer video instructions, we have a giant database of those, too. Video instructions can be especially helpful as you can see exactly how the paper moves between each step.
Instructions for the best origami models can only be found in books. If you’re still looking for more awesome things to fold, check out our list of best origami books. We’ve written reviews and made lists of the models you’ll find in each one. No matter what you’re looking for, you’ll definitely find some cool things to fold.